Upgrade Path for Oracle Database to Oracle 12c Release 1 (12.1)
Minimum version of the database that can be directly upgraded to Oracle 12c Release 1 (12.1)
| Source Database | Target Database |
|---|
| 10.2.0.5 |
12.1.x |
| 11.1.0.7 |
12.1.x |
| 11.2.0.2 or higher |
12.1.x |
The following database versions will require an indirect upgrade path:
| Intermediate Upgrade Path for Target Database |
|
|---|
| Target Database |
|---|
| 11.2.0.1 |
----> |
11.2.0.2 or higher |
----> |
12.1.x |
| 11.1.0.6 |
----> |
11.1.0.7 or 11.2.0.2 or higher |
----> |
12.1.x |
| 10.2.0.4 (or earlier) |
----> |
10.2.0.5 or later direct upgrade version |
----> |
12.1.x |
| 10.1.0.5 (or earlier) |
----> |
10.2.0.5 or later direct upgrade version |
----> |
12.1.x |
| 9.2.0.8 (or earlier) |
----> |
9.2.0.8 --> 11.2.0.2 or higher |
----> |
12.1.x |
For example:
- If you are upgrading from 11.2.0.1 or 11.1.0.6, then you must first upgrade to Oracle Database 11g Release 2 (11.2.0.2).
- If you are upgrading from 10.2.0.2, 10.2.0.3, 10.2.0.4, or 10.1.0.5, then you must first upgrade to 10.2.0.5 or later.
- For release 9.2.0.8, you must first upgrade to an intermediate
Oracle Database release, as follows: 9.2.0.8 -> 11.2.0.2 or 11.2.0.3
-> 12.1
Note:
To locate the patch-id of a patch-set refer to:
Upgrading Oracle Database 11.2.0.3 to 12.1.0 steps
There are different ways of upgrading to the latest release
of Oracle database and Oracle provides multiple methods to upgrade. Few are
listed below:
- Database Upgrade Assistant (DBUA)
- Manual Upgrade
- Transportable Tablespaces
- Datapump export/import
- Oracle Streams
- Oracle GoldenGate
I chose DBUA to upgrade my test database as it was the
simplest and quickest of all. Below are the database environment details prior
to upgrade:
Server details below
OS : OEL 5.4 (64 bit)
Database : 11.2.0.3 (64 bit)
Note:- Before starting the up-gradation process, take the complete backup of database.
1)Take cold backup of 11.2.0.3 database
[oracle@Murali ~]$ cd $ORACLE_BASE
[oracle@Murali oracle]$ ls
admin cfgtoollogs checkpoints diag fast_recovery_area oradata product
[oracle@Murali oracle]$ cd oradata/
[oracle@Murali oradata]$ ls
PROD
[oracle@Murali oradata]$ cd PROD/
[oracle@Murali PROD]$ ls
control01.ctl redo01.log redo03.log system01.dbf undotbs01.dbf
example01.dbf redo02.log sysaux01.dbf temp01.dbf users01.dbf
[oracle@Murali PROD]$ cd ..
[oracle@Murali oradata]$ ls
PROD
[oracle@Murali oradata]$ cp -R PROD/ PROD_backup
2) Stop the Listener
[oracle@Murali admin]$ lsnrctl stop PROD
LSNRCTL for Linux: Version 11.2.0.3.0 – Production on 04-DEC-2014 11:32:26
Copyright (c) 1991, 2014, Oracle. All rights reserved.
Connecting to (DESCRIPTION=(ADDRESS=(PROTOCOL=TCP)(HOST=Murali.oracle.com)(PORT=1521)))
The command completed successfully
3) Create directory structure for 12c ORACLE_HOME
[oracle@Murali product]$ mkdir -p /u01/app/oracle/product/12.1.0
4) export ORACLE_HOME to 12c
[oracle@Murali 12.1.0]$ export ORACLE_HOME=/u01/app/oracle/product/12.1.0
5) Copy ( winscp or scp ) 12c software to /home/oracle
6) Launch Oracle 12c runinstaller
[oracle@Murali database]$ pwd
/home/oracle/database
Note: open new terminal & run xhost + command as a root user before running ./runInstaller
[oracle@Murali database]$ ./runInstaller
Un-check “I Wish to receive security updates via My oracle support” and click Next
Click Yes
Select “Skip Software Updates” and click Next.
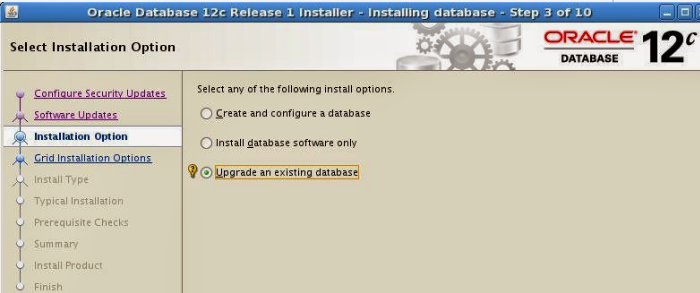
select “Upgrade an existing database” and click Next
select “Upgrade an existing database” and click Next
Select your language and click Next
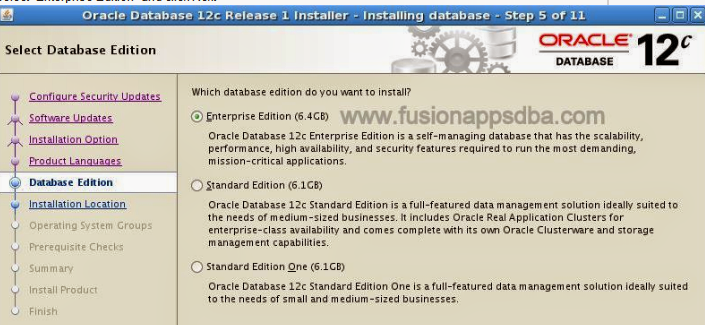
Select “Enterprise Edition” and click Next
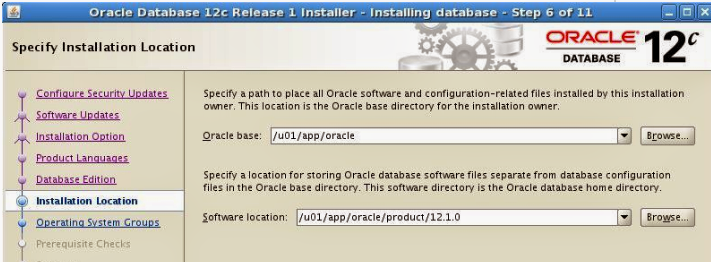
Fill the details for ORACLE_BASE and software location and click Next
Select the OSOPER grouop (Optional) and click Next
If you satisfy with the summary click Next
Now Oracle Database 12c installation starts

Run the scripts as root user
[root@Murali ~]# /u01/app/oracle/product/12.1.0/root.sh
Performing root user operation for Oracle 12c
The following environment variables are set as:
ORACLE_OWNER= oracle
ORACLE_HOME= /u01/app/oracle/product/12.1.0
Enter the full pathname of the local bin directory: [/usr/local/bin]:
The file “dbhome” already exists in /usr/local/bin. Overwrite it? (y/n)
[n]:
The file “oraenv” already exists in /usr/local/bin. Overwrite it? (y/n)
[n]:
The file “coraenv” already exists in /usr/local/bin. Overwrite it? (y/n)
[n]:
Entries will be added to the /etc/oratab file as needed by
Database Configuration Assistant when a database is created
Finished running generic part of root script.
Now product-specific root actions will be performed.
Click OK after completion of running that script.
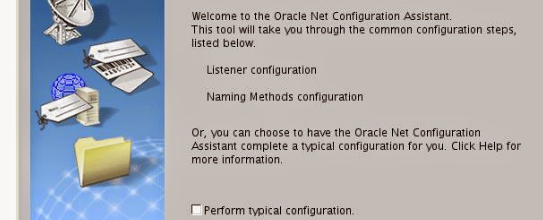
[root@Murali ~]# netca
Click next
Fill the Listener Name and click Next
Click Next
Select the port number and click Next
Select No and click Next
click next
Click Finish
Now start DBUA (Database Upgrade Assistant)
Select “Upgrade Oracle Database” and click Next
Click Next
click on that “Pre Upgrade Utility Checks” – severiy
You might see this error, safely ignore this error because this is a test machine.
Choose Ignore from Action menu and click Next
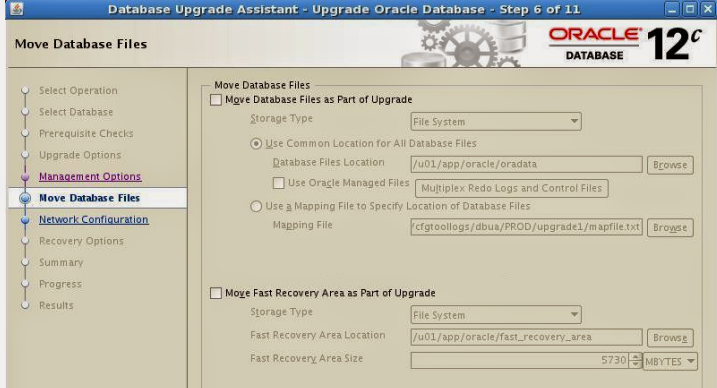
Check the file locations and click Next
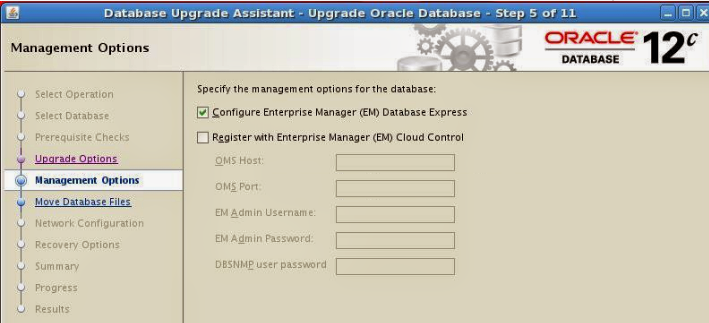
Select “Configure Enterprise Manager (EM) Database Express and click Next
 Click Next
Select listener and click Next
Choose ” I have my own backup and restore strategy” and click Next
Click Finish
Click Next
Select listener and click Next
Choose ” I have my own backup and restore strategy” and click Next
Click Finish
Oracle Database upgrade in progress,
Pre-Upgrade steps will complete in seconds
but Database Upgrades Steps takes at-least 90 min of time based on your
machine performance and post upgrade steps will take just 5 mins.
After finishing all up-gradation steps click on “Upgrade Results”
click “close”
 After successfully completion of upgradation click “close”
Oracle Database upgradation from 11g to 12c completed successfully.
Check it out the version of the upgraded database
After successfully completion of upgradation click “close”
Oracle Database upgradation from 11g to 12c completed successfully.
Check it out the version of the upgraded database
[oracle@Murali database]$ sqlplus / as sysdba
SQL*Plus: Release 11.2.0.3.0 Production on Thu Jul 4 21:07:50 2013
Copyright (c) 1982, 2011, Oracle. All rights reserved.
Connected to:
Oracle Database 12c Enterprise Edition Release 12.1.0.1.0 – 64bit Production
With the Partitioning, OLAP, Advanced Analytics and Real Application Testing options
SQL> select banner from v$version;
BANNER
——————————————————————————–
Oracle Database 12c Enterprise Edition Release 12.1.0.1.0 – 64bit Production
PL/SQL Release 12.1.0.1.0 – Production
CORE 12.1.0.1.0 Production
TNS for Linux: Version 12.1.0.1.0 – Production
NLSRTL Version 12.1.0.1.0 – Production